GES 3050: Introduction to Cartography
Welcome to Cartography Labs
This is the main website where you can find all lab related materials. This website is developed and maintained by Dr. Fuzhen Yin from the department of Geography & Environmental Studies at UCCS.
Acknowledgement
The tutorials included in this lab are structured based on the materials Group Mini Project Digital Visualisation developed by Dr. Duncan Smith from CASA UCL. Many thanks to Dr. Duncan Smith.
Students’ Works
Overview
This practical provides an introduction to Hypertext Markup Langauge (HTML), the foundation of web pages. It also introduces Cascading Style Sheets (CSS), the basis for the styling and layout of web pages, and the link between HTML and JavaScript libraries for interactive websites.
Some tutorials for learning the basic of web design:
- W3School - free education platform for learning code online
- LinkedIn HTML Online Training Courses
What is a Web Page? HTML and CSS
At its most basic, the web is a series of files on a server that are downloaded and viewed in your web browser. The core files for a static web page are:
- Hypertext Markup Language (HTML) files define the
structure and content of web pages. HTML files directly contain the text
content of the page on a static web page. Dynamic pages typically refer
to external data files or database links on the server, that then
generate HTML pages. HTML markup consists of tags containing content.
The following is a paragraph element:
<p>This is a paragraph on an HTML page</p> - Cascading Style Sheets (CSS) define the layout and presentation of a web page, including text styling, colors and position on the page. CSS information can be provided as part of an HTML file, or as an external file that is linked to from the HTML file header.
Publish Your Map GitHub
Github is a cloud-based platform where you can store, share, and work together with others to write code.
Storing your code in a “repository” on GitHub allows you to:
- Showcase or share your work.
- Track and manage changes to your code over time.
- Let others review your code, and make suggestions to improve it.
- Collaborate on a shared project, without worrying that your changes will impact the work of your collaborators before you’re ready to integrate them.
Our lab’s website Cartography Labs is hosted on GitHub and the source file can be found here: https://github.com/fuzhen-yin/uccs_cartography.
- First, please go to Github to create an account.
- Then, you should see an interface similar to Figure 1.1.
A GitHub repository, or “repo,” is a fundamental element of GitHub and Git, acting as a centralized storage for project files, allowing for version control and collaboration, and tracking changes and history. Let’s create our first repository for the cartography class.
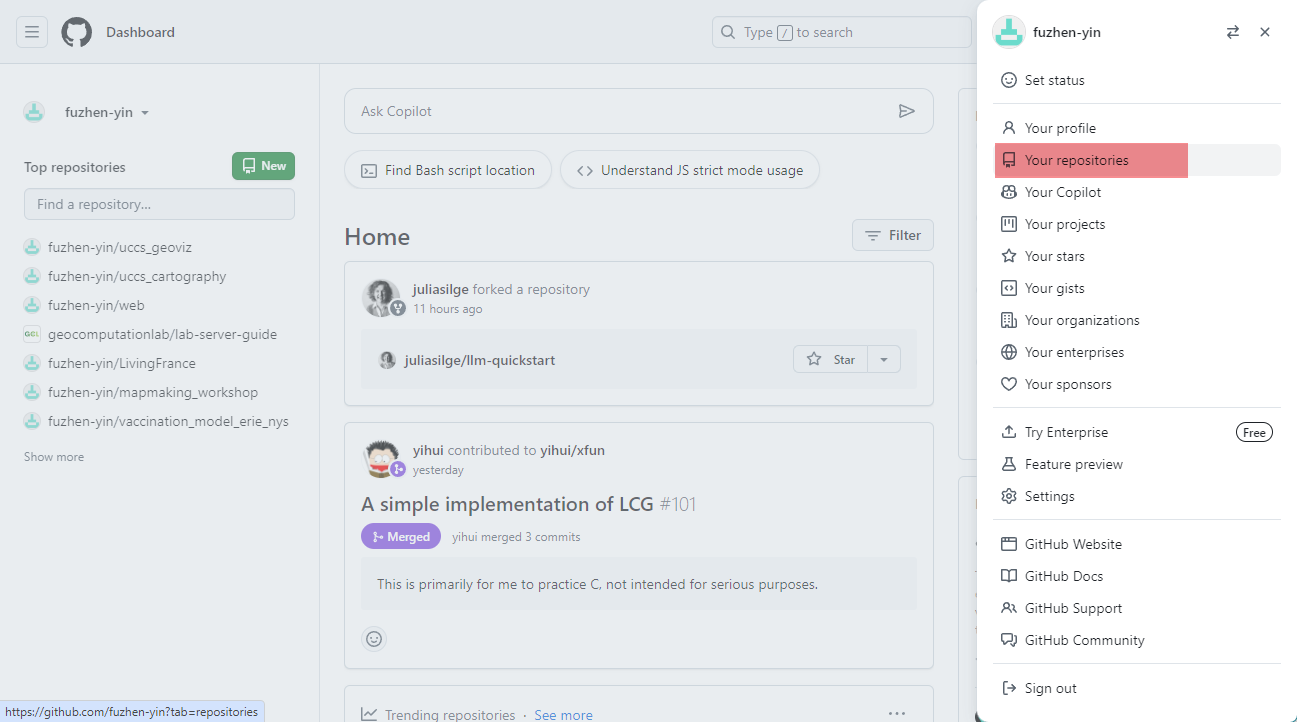
- Click on your profile icon on the top-right
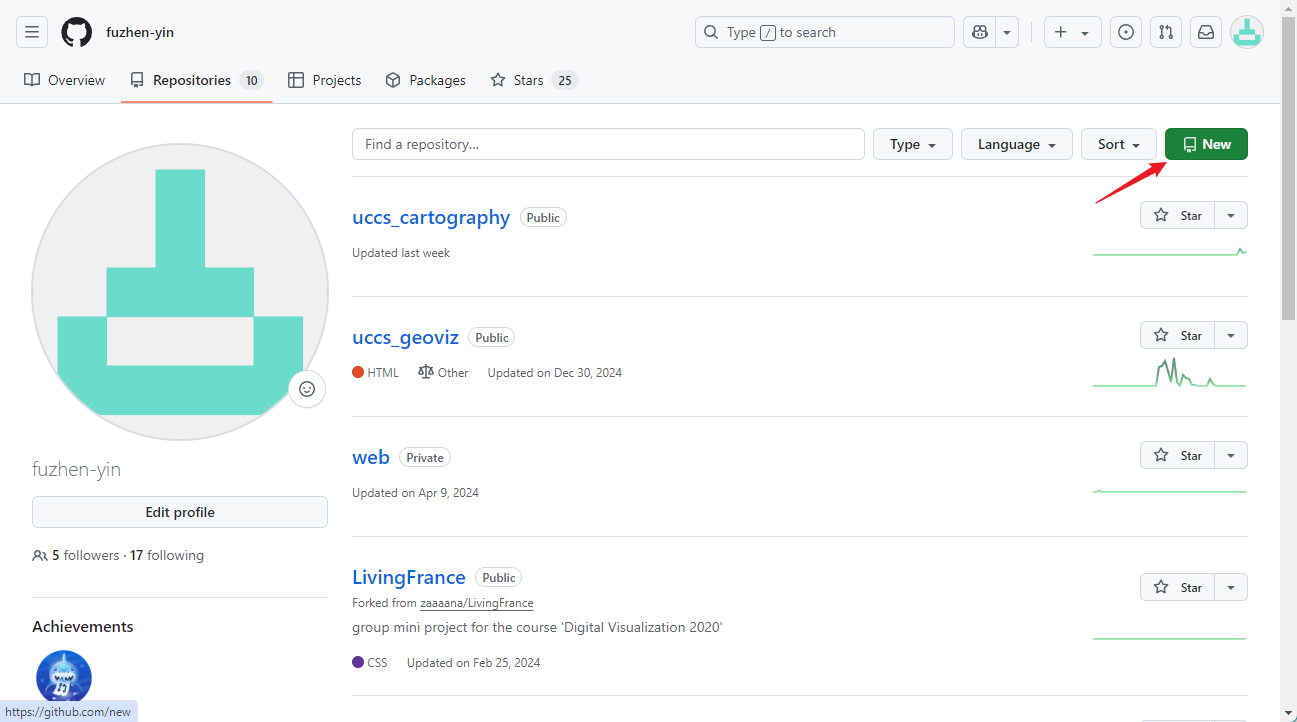
- Next, go to Your Repositories.
- Here you can see all your repositories and their status. Let’s click on the green button New to create a new Repository.
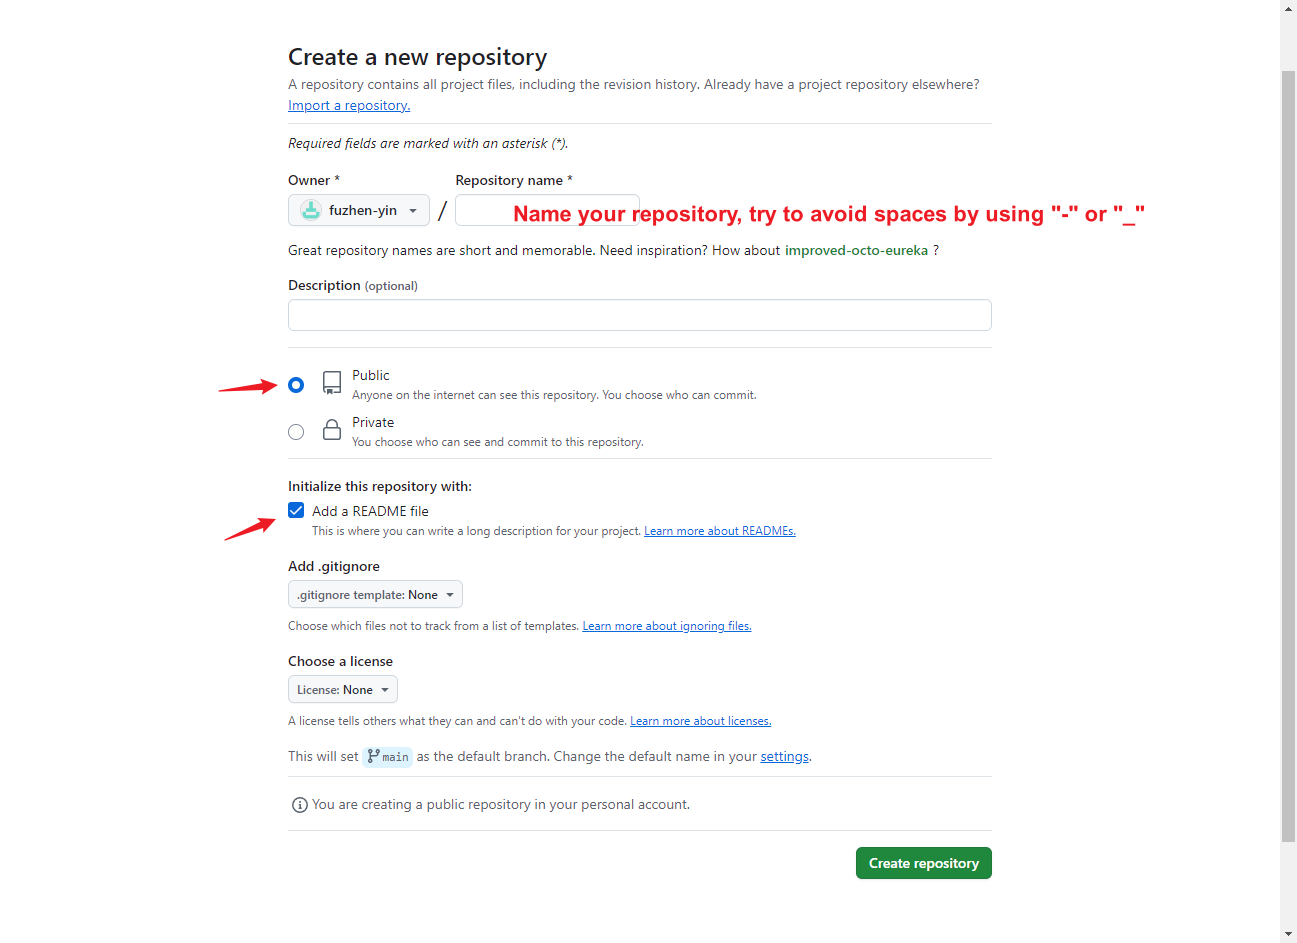
- Configure the new repository by giving it a name.
- Make it Public and Add a README file.
- Create repository
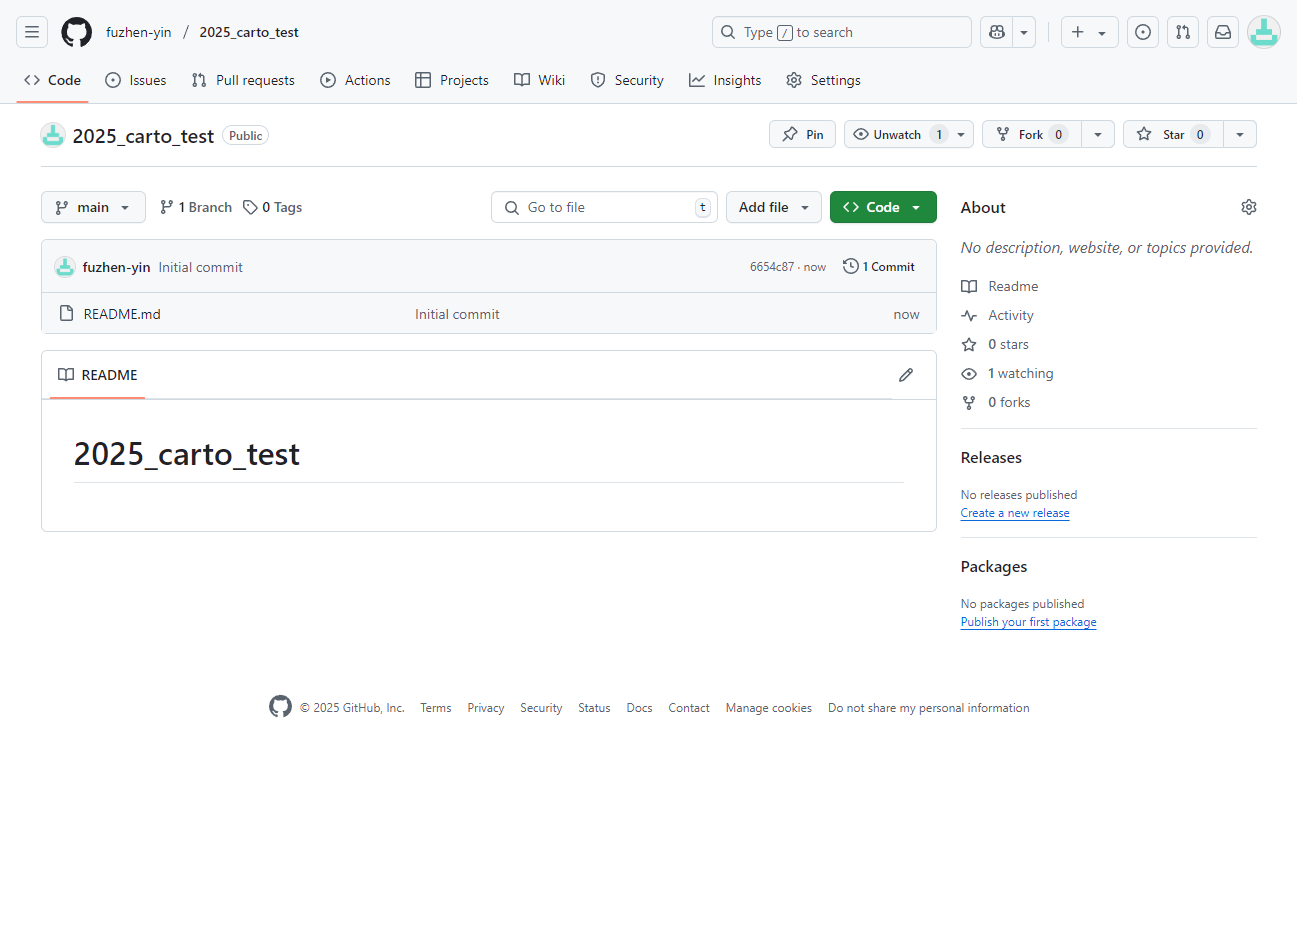
A README file in GitHub is a text file (often named README.md) that provides an introduction and documentation for a project hosted on GitHub, typically placed in the root directory of a repository, and is automatically displayed on the repository’s main page
- The repository’s homepage looks like the Figure 1.5
- Next, we are going to create Pages associated with this repository.
GitHub Pages is a static site hosting service that takes HTML, CSS, and JavaScript files from a GitHub repository and publishes them as a website.
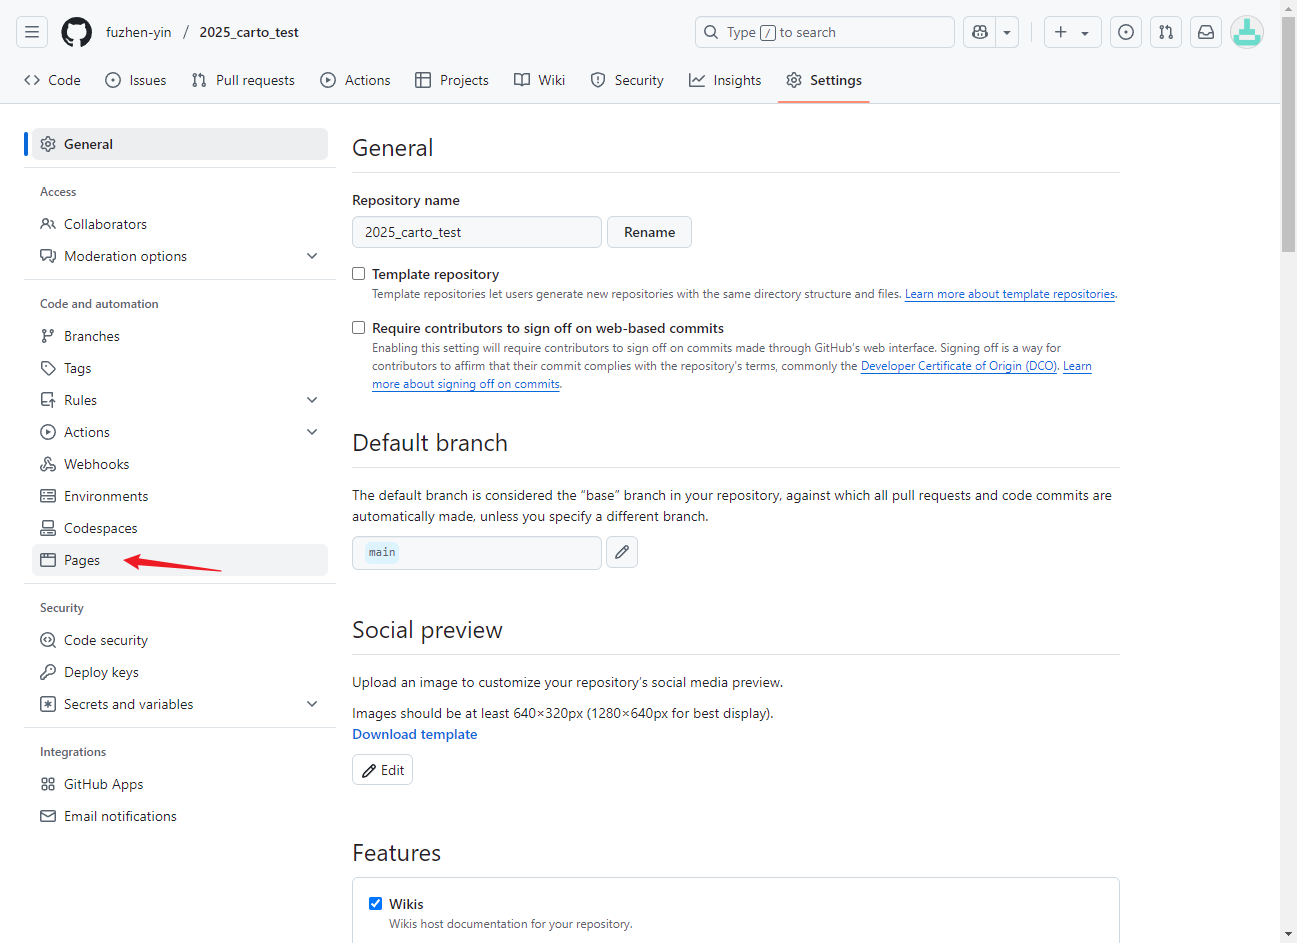
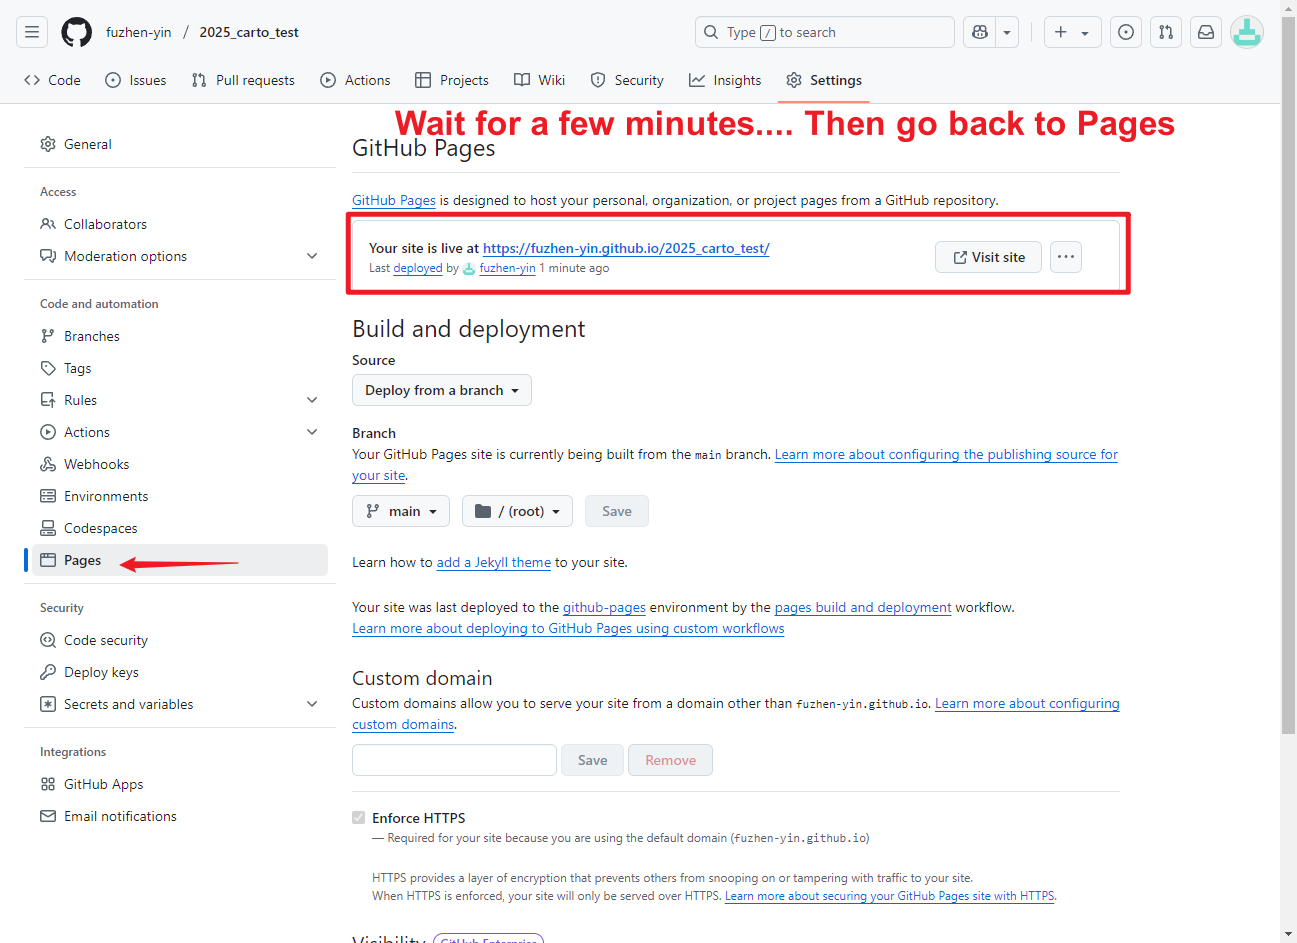
- Go to Settings, on the left panel, click Pages
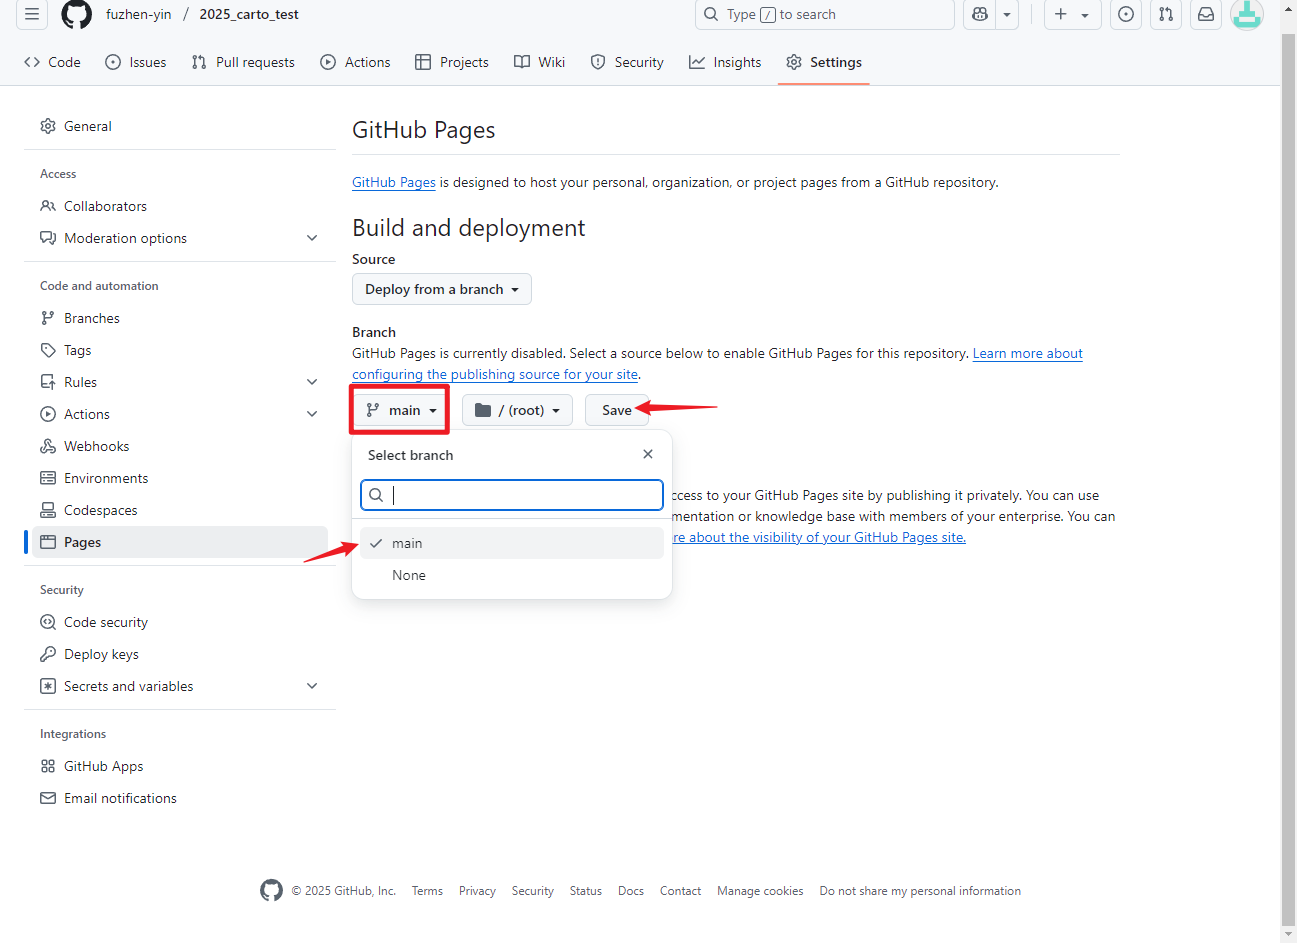
- Set the Branch to Main and Save
- Waiting for a few minutes, refresh by clicking on Pages again. You should see a line saying:
Your site is live at https://YOUR_USERNAME.github.io/YOUR_REPOSITORY/
- COPY this web address and save it somewhere as a text file (.txt), or BOOKMARK it.
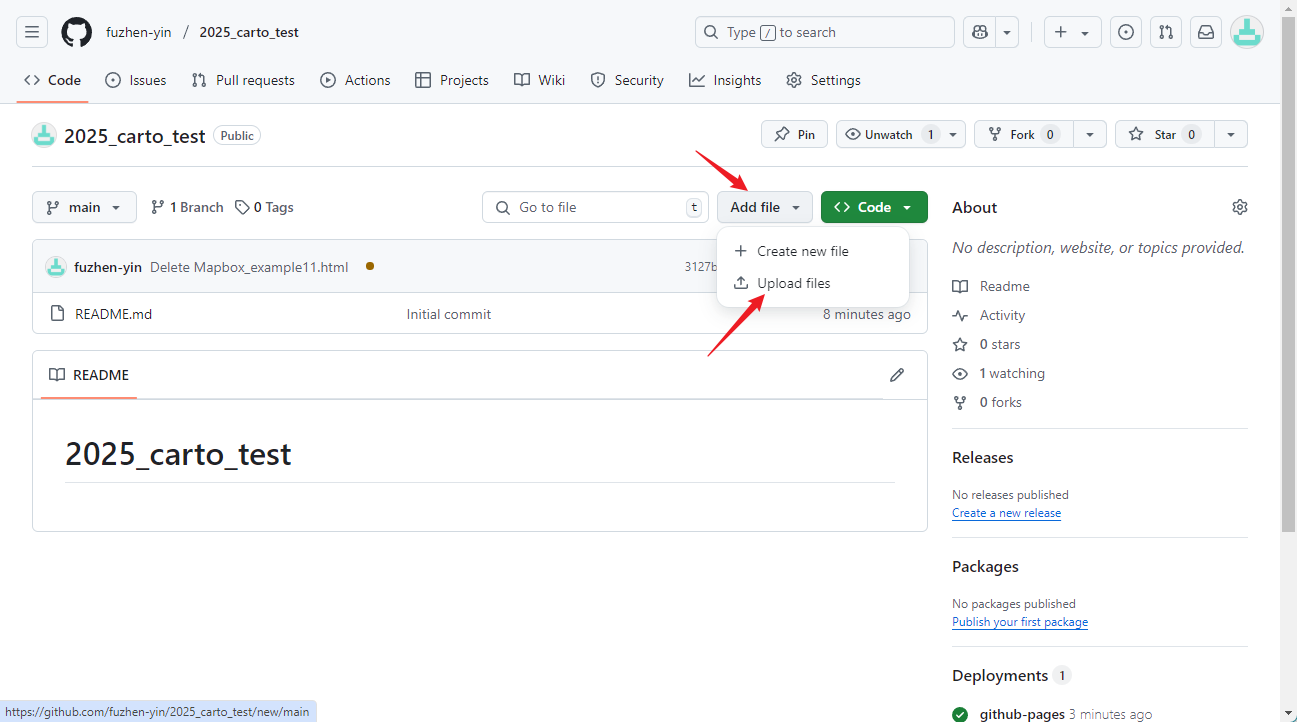
- Okay, we will go back to the main page of your repository (see
Figure 1.9) to upload some files.
- Click Add File then Upload files
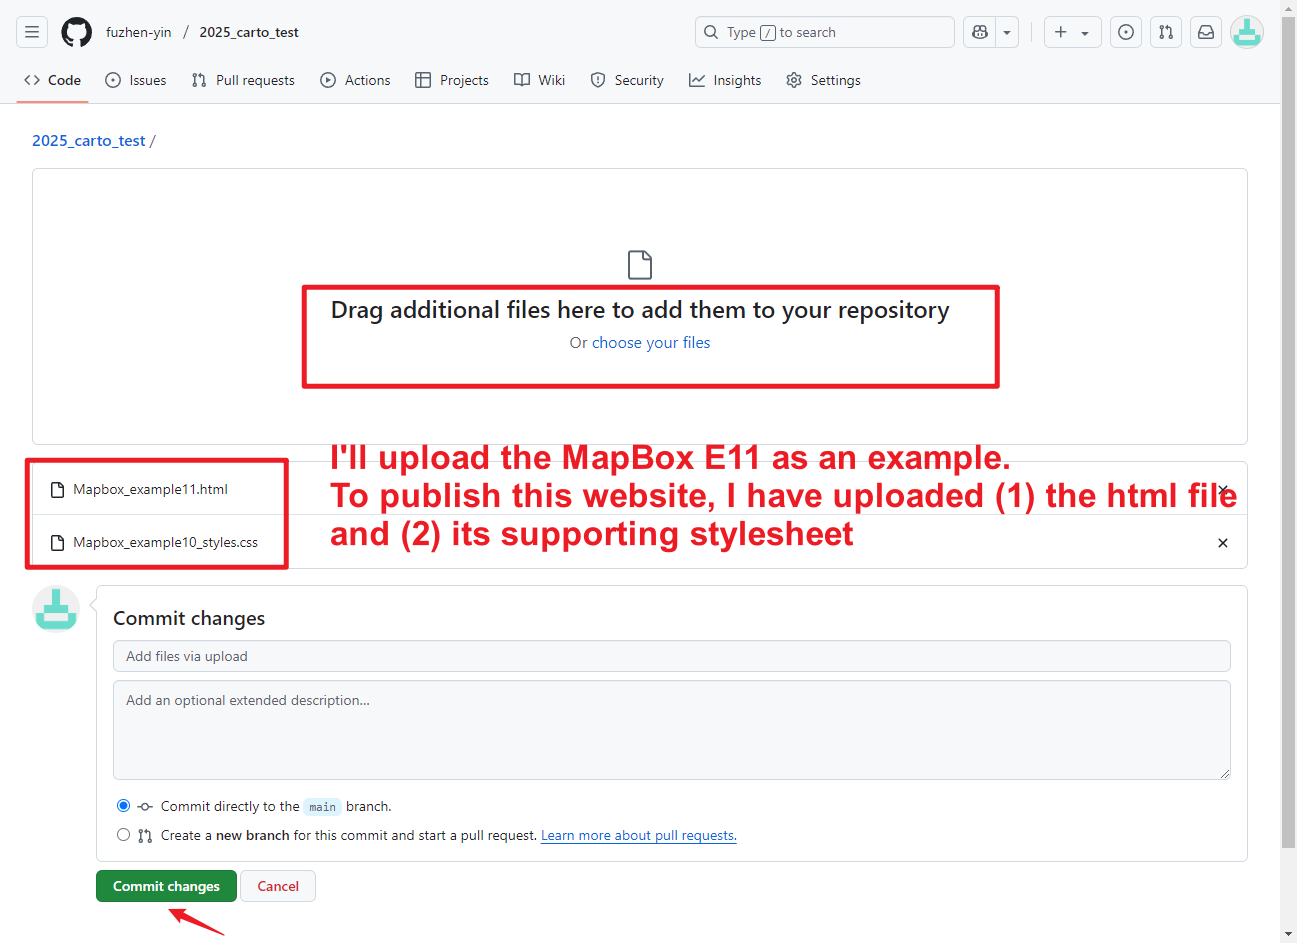
- Upload your .html files and supporting files (e.g., stylesheet, images, data…)
- Commit changes
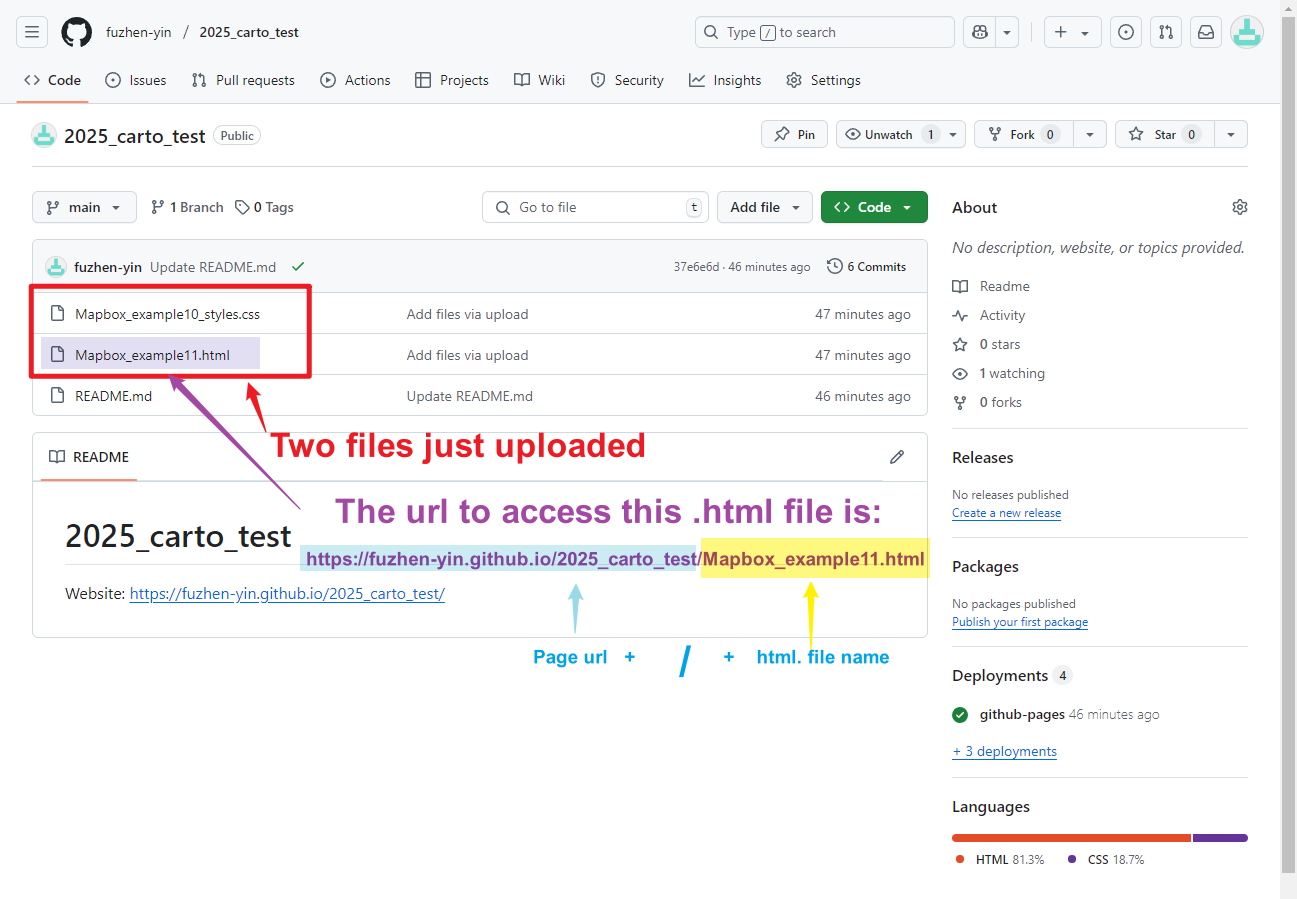
- After uploading your files, go back to your repository home page, your repository should look like Figure 1.11
- To access .html file online, the url is Web address of your repository (Figure 1.8) + / + HTML File Name
- For example, mine is: https://fuzhen-yin.github.io/2025_carto_test/Mapbox_example11.html
- Then, open this url in your browser, you should be able to your map online!!